
The Art of Bedscaping: How to Layer Your Bed Like an Interior Designer
Master the art of bedscaping with this designer guide to pillow arrangement, textile layering, and throw placement for a Pinterest-worthy bed. Make your bedroom show out with style.
BEDROOM
6/14/20265 min read
This post contains affiliate links. If you make a purchase through these links, we may earn a small commission at no extra cost to you.
1. Start With the Foundation: Your Base Layer
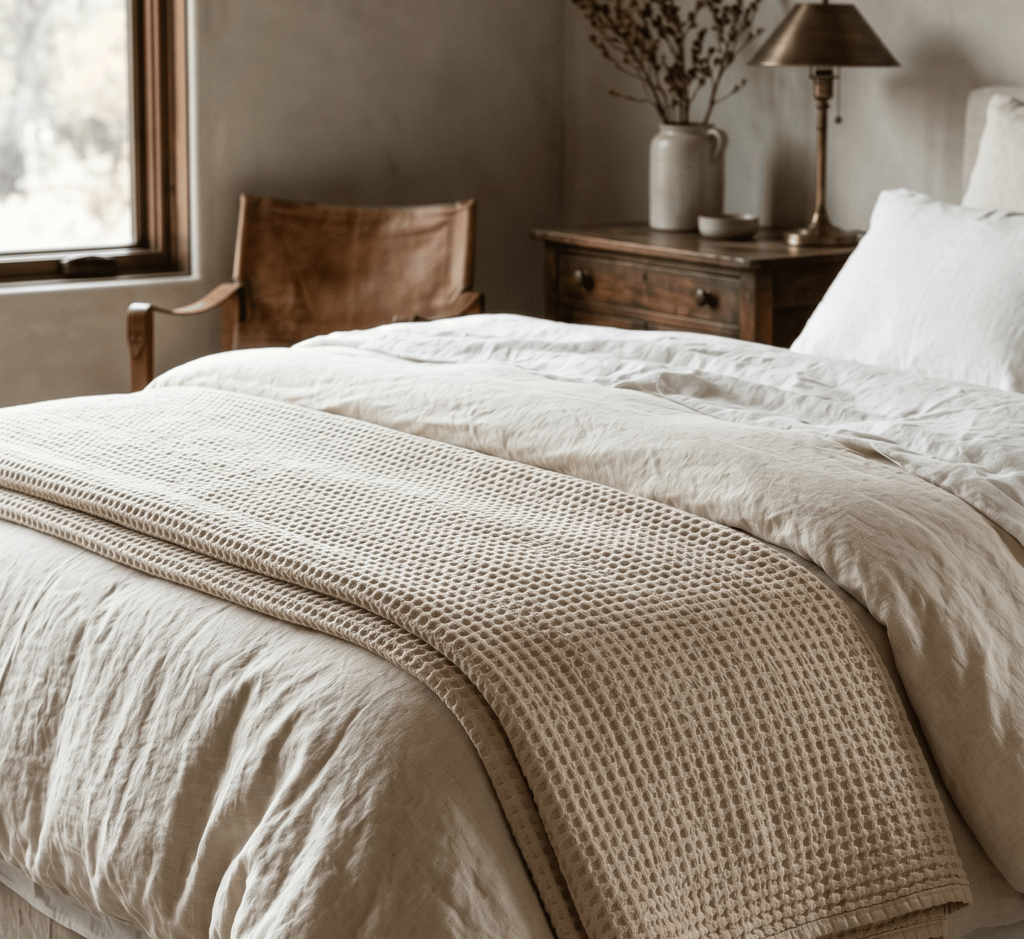
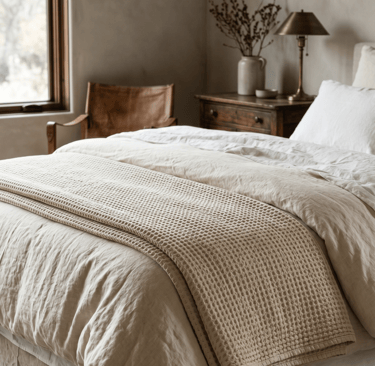
Before any styling happens, the foundation has to be right. A flat, thin duvet or comforter will undercut even the best pillow arrangement — designers always start with volume and texture at the base. A high-quality duvet insert (look for a generous fill weight) creates that plush, cloud-like look, while a textured coverlet or quilt folded at the foot of the bed adds dimension immediately.
The base layer should feel substantial but not stiff. Linen and waffle-weave textures are especially popular right now because they add visual interest without competing with the layers that come next. If your duvet cover is solid and neutral, this is the perfect place to introduce a subtle texture or a tonal pattern — it's the "canvas" everything else gets layered onto.
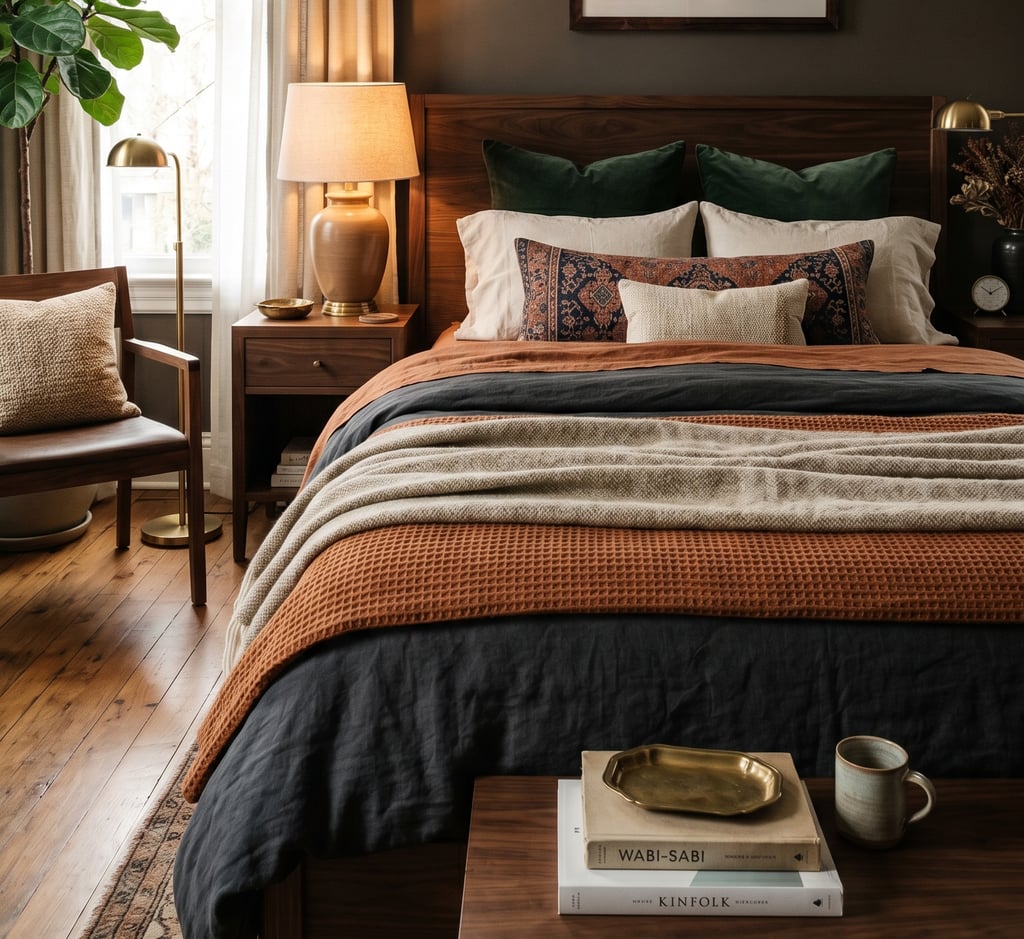
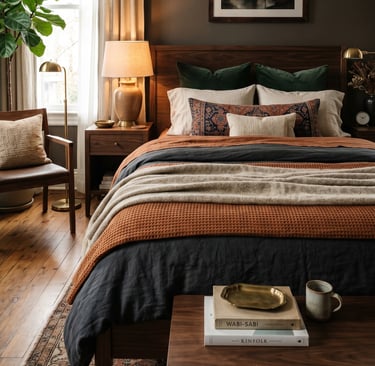
2. The Pillow Formula: Big to Small, Back to Front
This is where most people go wrong — either too few pillows (looks under-dressed) or too many with no structure (looks chaotic). Designers follow a simple descending formula that works on any bed size:
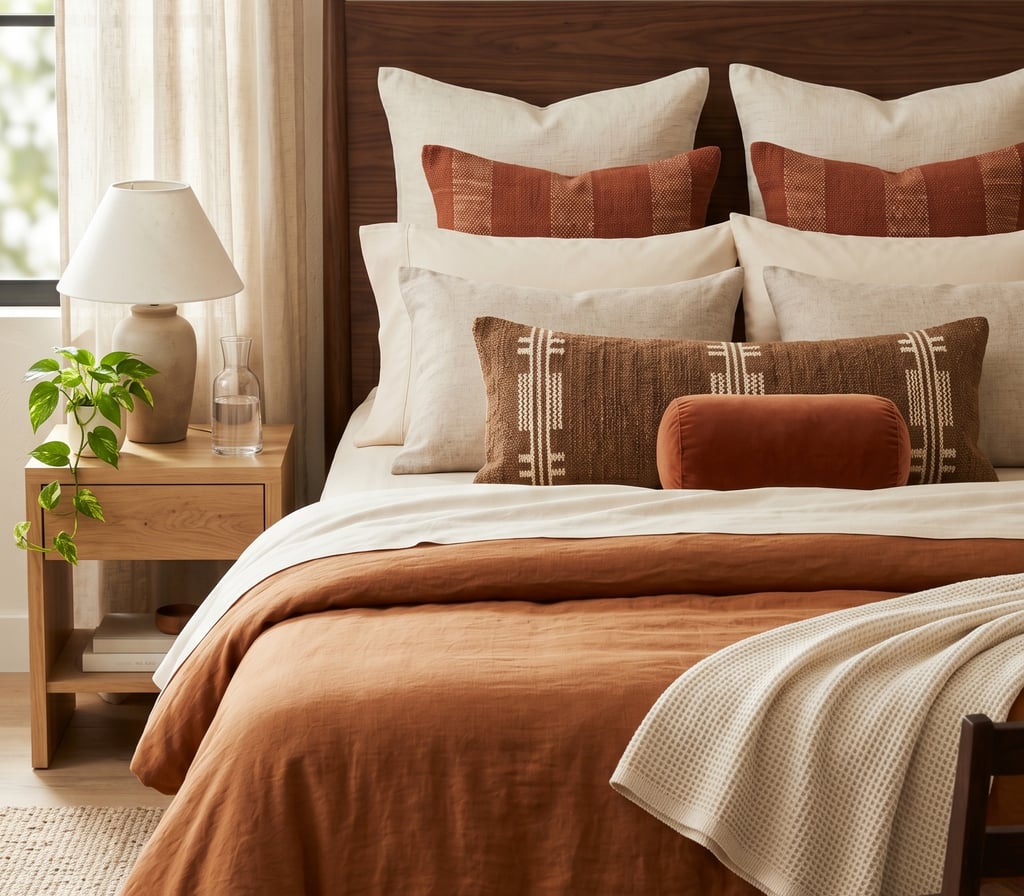
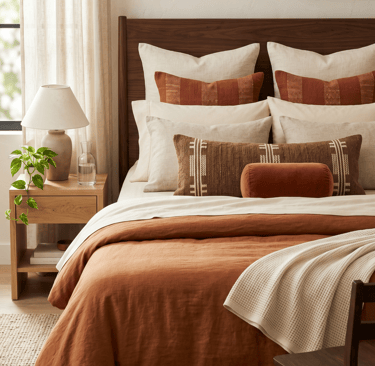
Layer 1 (Back row): Euro shams — large, square pillows (26x26") that sit upright against the headboard. Use two for a queen, two or three for a king.
Layer 2 (Middle row): Standard or king sleeping pillows in coordinating pillowcases. These are functional but should still match the palette.
Layer 3 (Front row): Decorative accent pillows — a lumbar pillow and one or two smaller accent pillows (18x18" to 20x20") in a contrasting texture or pattern.
The rule of thumb: each row should be slightly smaller than the one behind it, creating a gentle cascade. An odd number of total pillows (5 or 7) almost always looks more intentional than an even number.
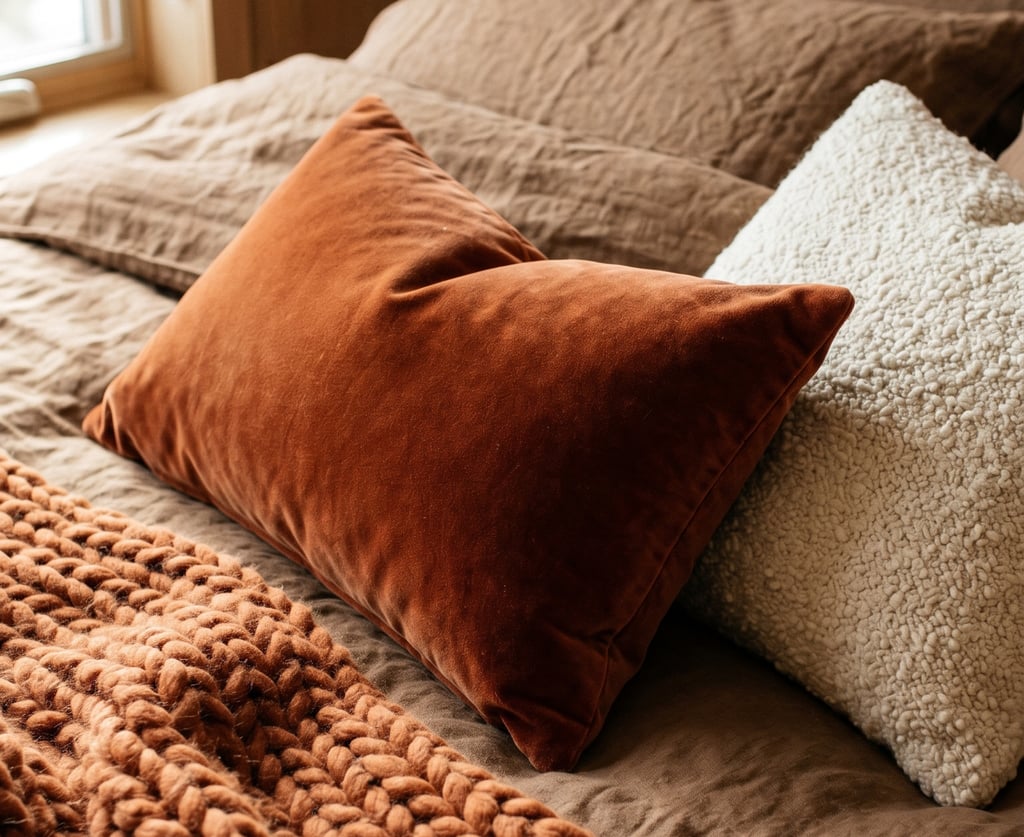
3. Mixing Textiles Without It Looking Mismatched
The "designer look" almost always comes down to texture variety within a controlled color story. The trick is to pick 2-3 core colors or tones, then express those tones through different materials — velvet, linen, bouclé, knit, faux fur — rather than repeating the same fabric throughout.
For example, if your palette is rust, cream, and walnut brown: try a linen duvet, a velvet lumbar pillow, a bouclé accent pillow, and a chunky knit throw — all in shades within that palette, but each with a distinct tactile quality. This is what creates that rich, "collected over time" feel rather than a matching three-piece set straight out of a package.
A good rule: if everything on the bed is the same texture, it will look flat in photos no matter how nice the colors are. Texture is what catches light and creates depth.

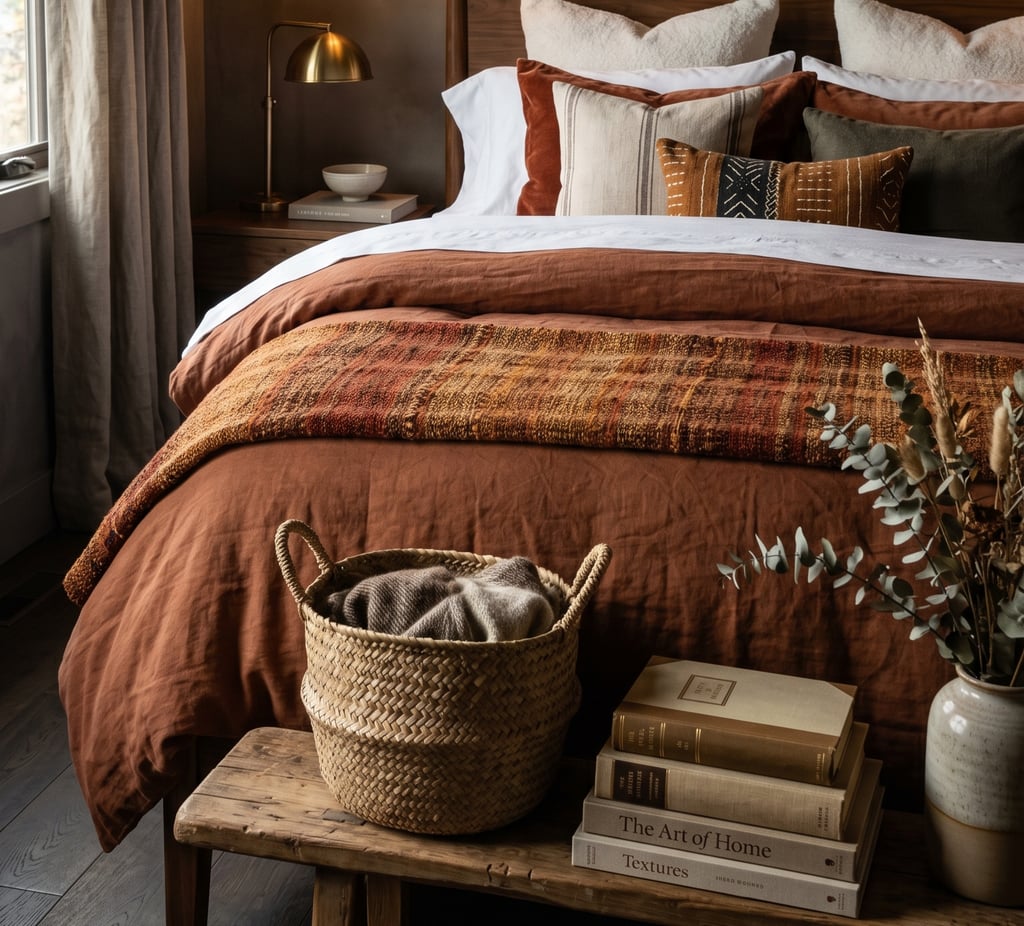
4. The Throw Blanket: Placement Is Everything
A throw blanket is one of the highest-impact, lowest-cost styling tools — but placement makes or breaks the effect. There are three designer-approved methods:
The Diagonal Fold: Fold the throw in half lengthwise, then drape it diagonally across one corner of the bed, roughly one-third of the way up. This is the most popular "editorial" placement and photographs beautifully.
The Foot-of-Bed Stack: Fold the throw into a neat rectangle and place it at the foot of the bed, layered on top of (or beside) a folded quilt. This works well on beds that already have a busy pillow arrangement, since it adds texture without competing for attention.
The Draped Cascade: Drape the throw loosely over one side of the bed so it spills slightly onto the floor or a bench. This creates a relaxed, lived-in look that pairs well with more minimalist pillow styling.
Whichever method you choose, pick a throw with visible texture — chunky knit, faux fur, or a textured weave — since flat fabrics tend to disappear visually once placed.
5. The Finishing Touches That Pull It All Together
The final 10% is what separates a "nice bed" from a magazine spread. A few small additions create that sense of intention and polish:
A folded quilt or coverlet at the foot of the bed adds another textural layer and a pop of pattern if your bedding is solid.
A bed runner — a long, narrow textile placed across the foot of the bed — is a designer trick borrowed from hospitality design that adds color and texture without overwhelming the palette.
An accent object, like a small woven basket, a stack of linen-bound books, or a single dried floral stem placed on the bed itself (yes, on the bed — it's a styling trick for photos and reads as effortless in person too).
Step back and look at the whole composition before calling it done. A great bedscape has visual weight distributed across the bed — not all piled on one side — and a clear sense of a "front" that faces into the room.
Final Thoughts
Bedscaping isn't about buying more — it's about layering with intention. Start with a great foundation, build your pillows from large to small, mix textures within a tight color story, place your throw with purpose, and finish with one or two small accent pieces. Once you've done it a few times, the formula becomes second nature, and your bed will go from "made" to styled every single time.
There's a reason designer bedrooms look effortlessly inviting while a basic comforter-and-two-pillows setup feels flat. The secret isn't an expensive bed frame or a complete room overhaul — it's bedscaping, the layered, intentional art of dressing your bed the way a hotel stylist or interior designer would. Once you understand the formula, you can recreate that editorial, Pinterest-worthy look on any bed, in any budget, in under an hour.
This guide breaks bedscaping down into its core building blocks: the foundation, the pillow formula, textile mixing, and the finishing layers that pull it all together.
Follow Us
Contact
© 2025. All rights reserved.
2 Fat Cats Home Decor brings stylish, cozy inspiration from living rooms to bedrooms and beyond — helping you create a warm, inviting home you'll never want to leave.